A one-stop-destination for data analytics, engineering and everything in between
A one-stop-destination for data analytics, engineering and everything in between
Within a business, sending automated emails with Power BI may greatly streamline decision-making and communication. This procedure can be effectively automated with Power Automate’s integration features.
Let’s look at an example where you would like to send a snapshot of the data from the Power BI environment. One approach is to send the file as an attachment to an email after exporting it to a PowerPoint presentation or PDF format. Utilizing the Export Data feature included in each visualization is an alternate method. However, there are several steps that must be performed and manual involvement is needed for this.
This can be automated with the help of the Zero Coding option provided by Power BI. With Power Automate’s integration capabilities, combined with the flexibility of DAX (Data Analysis Expressions), it is possible to efficiently automate this process (refer to Fig. A).
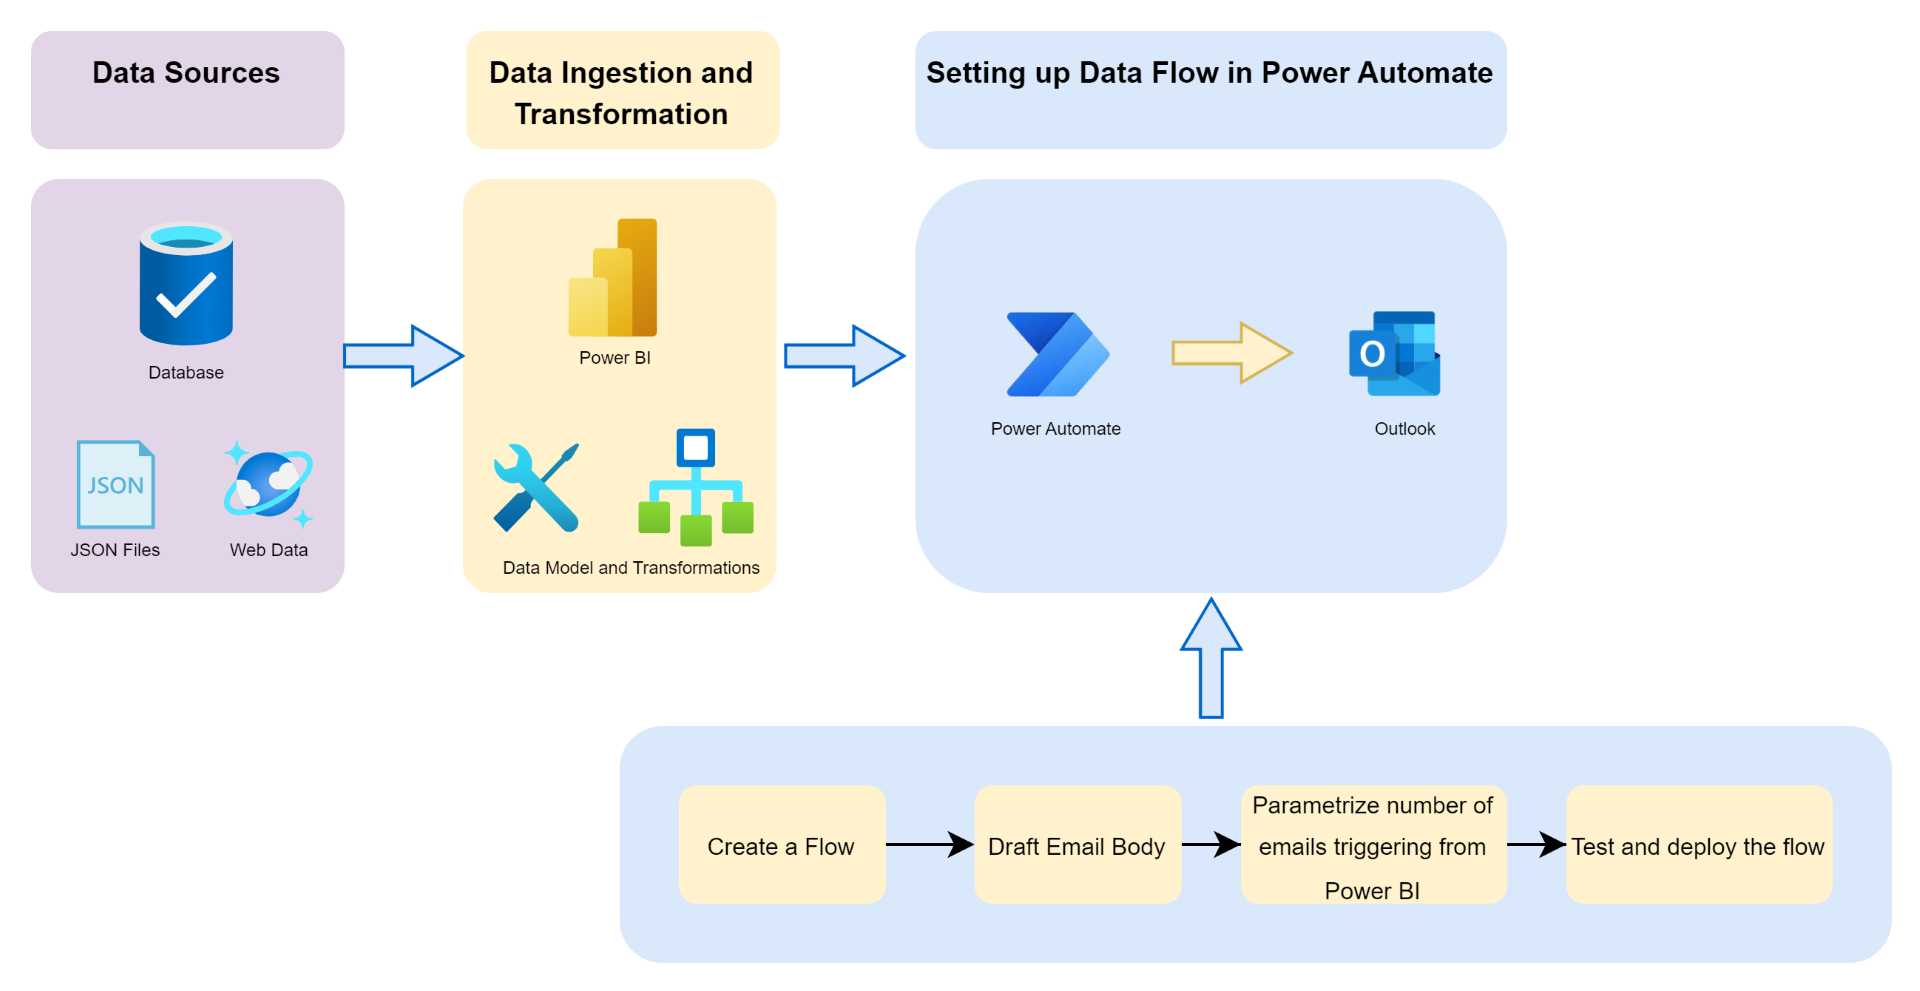
Figure A: Process flow of riggering emails
Imagine a situation where you have tabular sales and profit data from various distinct sales sources. There are five location administrators for each of the five sites, which are A, B, C, D, and E. I have made two distinct tables (see Fig. 1), one containing the email addresses of the location administrators and the other containing the sales and profit information for various sales sources. You wish to contact the location admins at each location with the sales and profit figures for each of them.
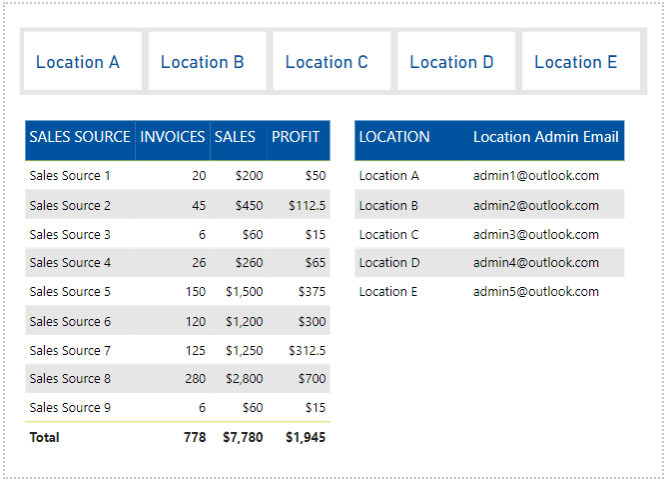
Figure 1: Test Data
To construct the flow, you can now refer to the procedures listed below.
Building a Power BI flow to send an email –
Place the Power Automate graphic into the canvas to get started. Select the metrics that you want to use in this flow. We will choose Sales Source, Sales, Gross Profit, #Invoices, Location, and Location Admin Email in our particular scenario (see Fig. 2).
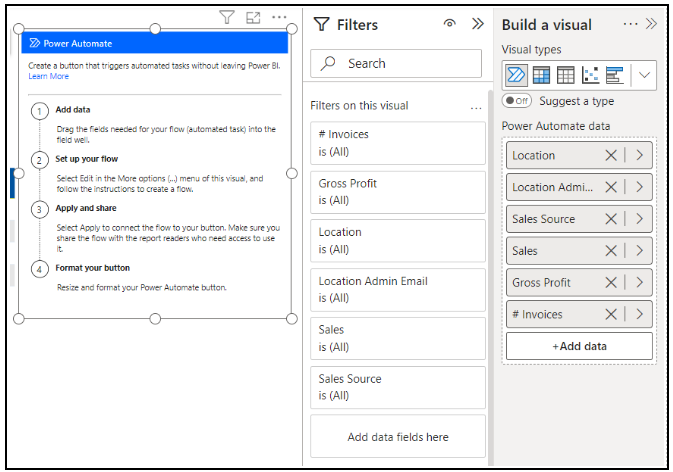
Figure 2: Data provided to the Power automate flow
Next, proceed to craft the flow and structure of the email layout you intend to send. To achieve this, select the edit option by clicking on the ellipses in the Power Automate visual (see Fig. 3).
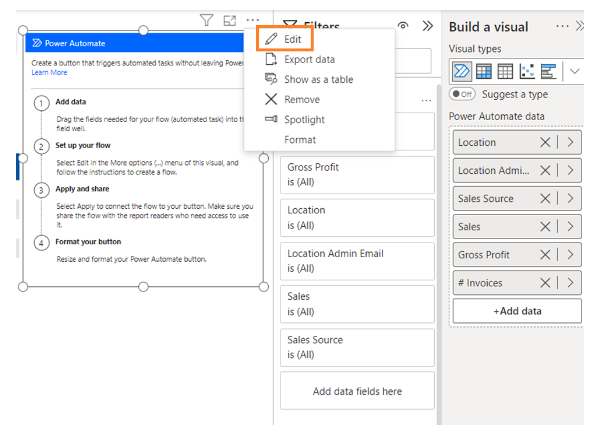
Figure 3: Edit the Power automate flow
A screen listing all of your current flows along with a list of available templates will show up. Click on the “New” option in the upper left corner (Fig. 4) and select “Instant Cloud Flow” to start a new flow.
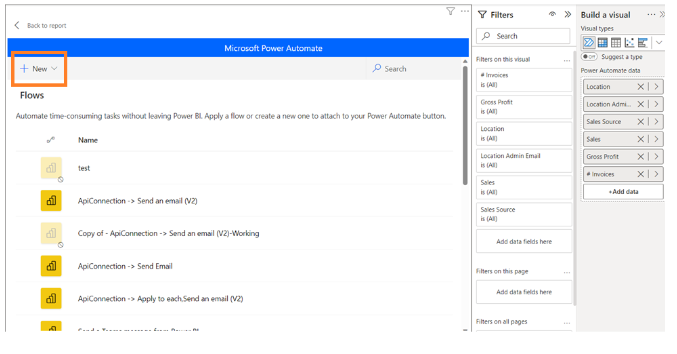
Figure 4: Create a new flow
You will be navigated to the page where you can construct the flow to trigger the email. Rename the flow as “Location Admin Email Flow.” Power Automate’s initial step suggests running the flow when the Power BI button is clicked. Below this, create a new step and search for “Send an email” in the search bar. You’ll encounter options like “send an email notification (V3)” and “send an email (V2).” At a glance, V3 triggers the email from the Power Automate service with a daily limit of 100 emails, while V2 sends the email from Outlook with a limit of 300 emails per minute. Microsoft offers thorough explanations of both strategies in [1] and [2].
Select the V2 method and include the email address, topic, and body of the recipient. This information can be hardcoded, or the content can be dynamically changed based on Power BI data. Here, we will make use of dynamic content (see Fig. 5). In the recipient area, select “Add Dynamic Content” and utilize the Power BI data, especially “Location Admin Email.” The email body may also contain dynamic content.

Figure 5: Add dynamic content
The final email body will look like this –

Figure 6: Email content
To link the flow to the constructed button, use the save and apply button. Now that the flow is prepared, you can send emails to the selected recipients by pressing the run button.
You can see in Fig. 6, that the email flow that we have built uses Apply to each function Although the table we’ve looked at isn’t very big, real-world applications frequently use bigger datasets. The function will cycle over each row in the dataset if it is used to real-world data. Should you send a separate email for every record, the email system can get overloaded. To address this, consider creating a variable that imposes a limit on the number of emails sent.
Controlling the number of emails triggering –
Initiate a variable and add a new action before the email body to get started. Further, click the “+” icon following the “On Power BI button clicked” step, and opt for “Add an action.” Search for “Variable” using the top search bar, then select the “Initialize Variable” action. Create the variable named “EmailControlVariable,” designate its type as integer, and set the initial value to 0. For information on this option, see Fig. 7.
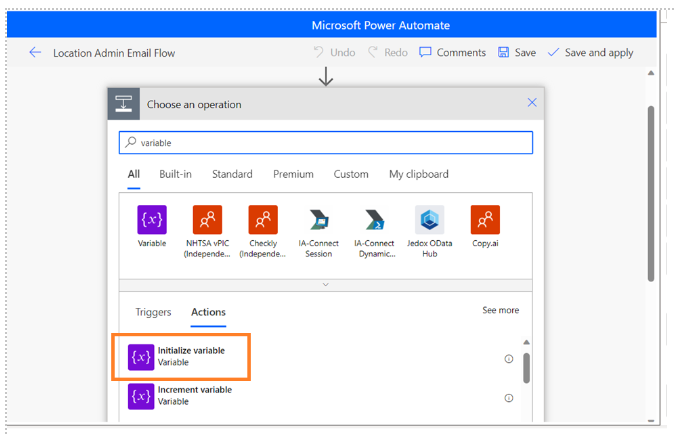
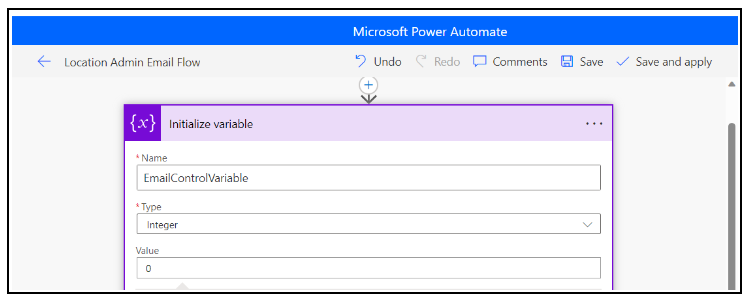
Figure 7: Initialize Variable
After initializing the variable, we will utilize the “apply to each” control to cycle over each number. To accomplish this, create a new action, select control, then search for apply to every action. The variable you wish to utilize in the “apply to each” function must have a name specified. In this case, the variable will be called “EmailControlVariable.” Now, add an action to increment the generated variable within the “apply to each” method.
We want to increment the number by one, so we’ll send the variable we made into the increment operation, setting its value to 1.
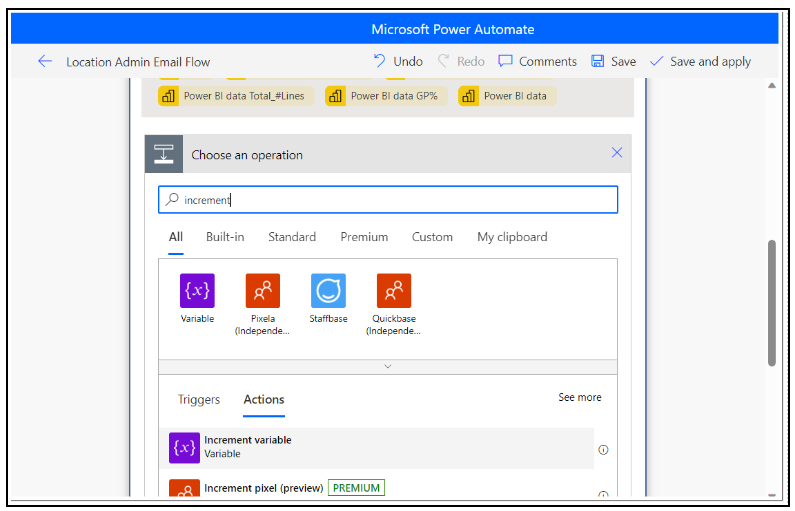
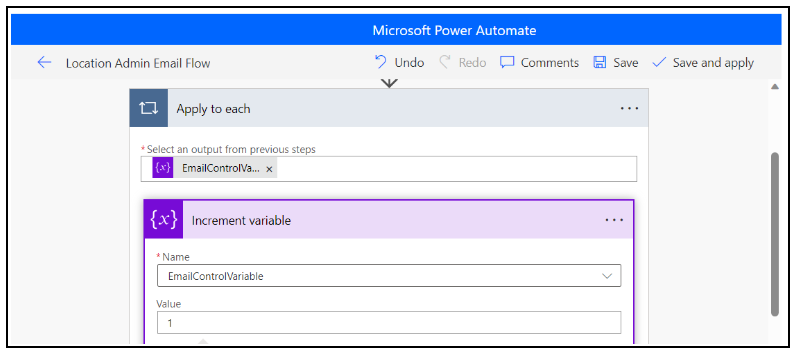
Figure 8: Increment Variable
Now, we need to establish a condition wherein we check if the record count is below a specified threshold, for instance, 10. If it is, we will initiate the email with the data; otherwise, we’ll send an error message. The condition is structured as follows:
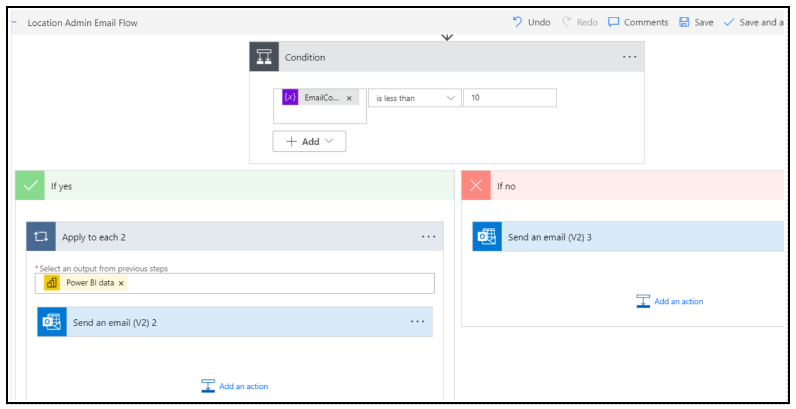
Figure 9: Conditionally sending an email
Now save the flow and hit the button to test the functionality. You can make changes to the body or flow design based on your requirements.
Conclusion –
In conclusion, automating email reports from Power BI using Power Automate offers a streamlined and efficient way to enhance communication and decision-making within an organization. By leveraging the integration capabilities of Power Automate, this process becomes accessible without the need for extensive coding. With the presented steps, users can adapt the flow to their specific needs and enhance the automation of email reports from Power BI.
References –

Boston, Massachusetts
Chicago, Illinois

Mumbai, Maharashtra

 +1 978 330 6045